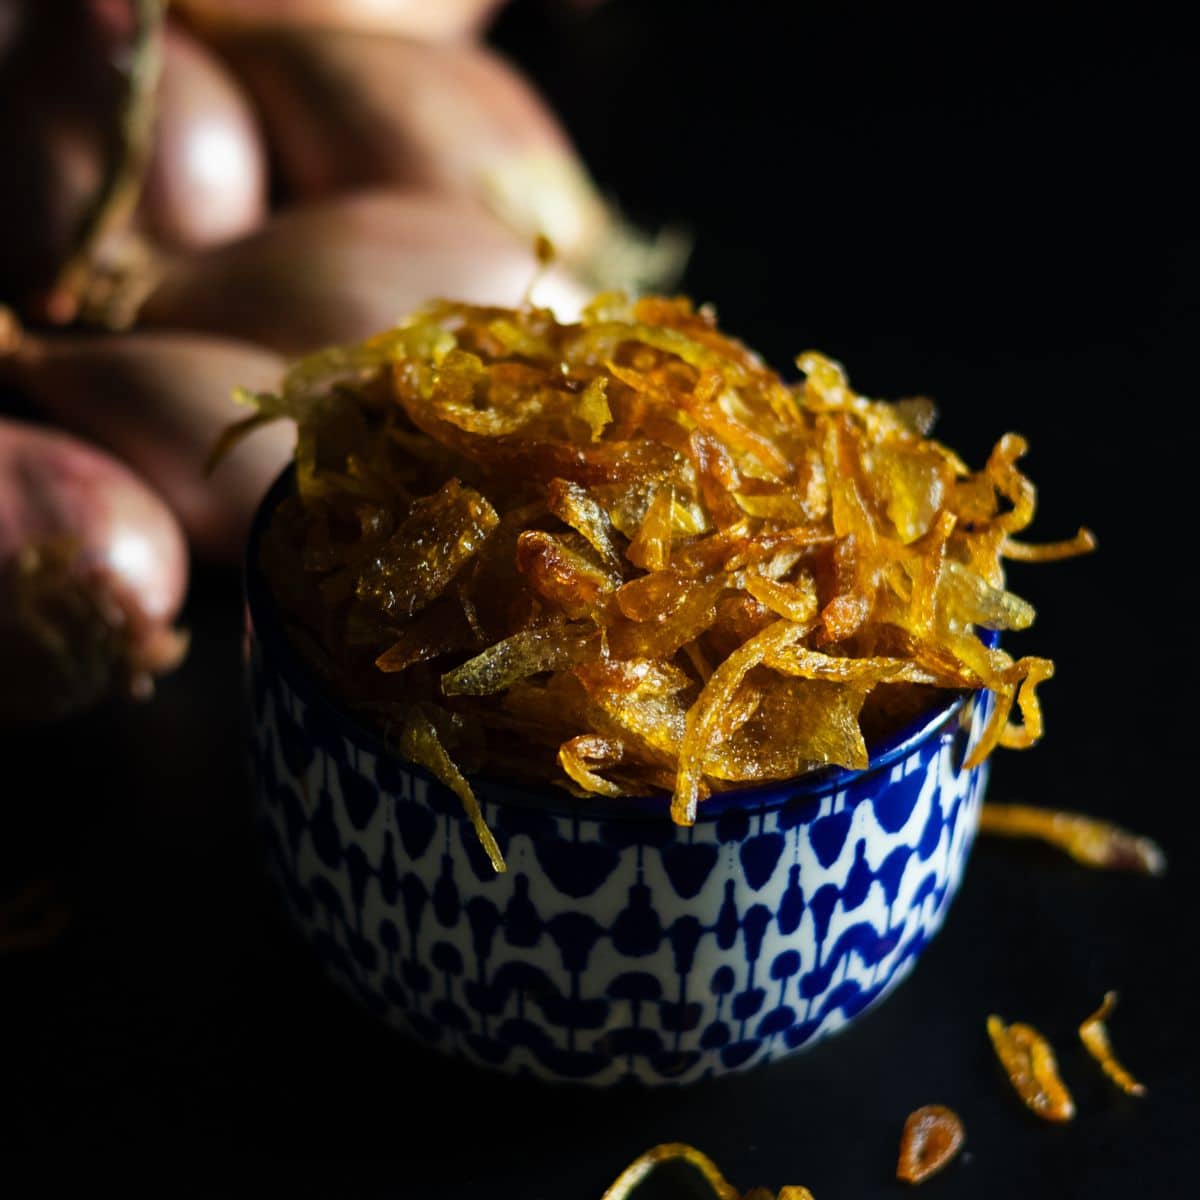
Crispy Fried Shallots Recipe
I do not love making crispy fried shallots! Yep, I said it. My husband doesn’t bother adding more store-bought crispy shallots to his meals. However, he finishes two cups of homemade fried shallots in one meal! Who eats two cups of shallots? Craig does! He thought they were a snack!
How to Make Fried Shallots Stay Crispy for a Month.
- Slice the shallots evenly. Use a mandolin or slicer for a quick and tear-free process.
- Lay the sliced shallots on paper towels. Sprinkle a little salt over them and let them sit for 4-5 minutes. Then, gently blot out the moisture with another piece of paper towel.
- Use enough oil to submerge all the shallots.
- Add the shallots to the oil and pan before turning on the heat. Then, turn the heat to medium-high. You’ll notice vapors around the pan—that’s moisture escaping from the shallots. Starting with cold oil allows more moisture to escape, resulting in crispier shallots. Sprinkle some more salt at this stage.
- Consistently stir and fry the shallots. Keep the heat on medium until the oil begins to boil. Then reduce the heat to low, stirring frequently to ensure even coloring. The vapor will start to lessen after about 20 minutes.
- Remove the shallots when they turn golden. Scoop them out of the hot oil and spread them evenly on paper towels. For the best results, lay several pieces of paper towel on a cooling rack before spreading the fried shallots. At this stage, they won’t be very crispy yet.
- Let the fried shallots cool completely. As they cool, they will become crispier. Use them right away or store them in an airtight container at room temperature.

What to Do with Shallots Oil after frying shallots.
Please don’t throw away the oil after frying shallots! It’s full of flavor and can be used to enhance your cooking. Here are some dishes that are perfect for using both the shallot oil and crispy fried shallots:
- Thai Fried Chicken: Super crispy and easily adaptable to be gluten-free.
- Pad Thai: A classic Thai dish that’s a favorite for everyone.
- Son-In-Law Eggs: A sweet and sour aromatic sauce pairs perfectly with eggs. (Fun fact: This dish has a playful reputation in Thai culture!)
- Chicken Rice: Use the leftover shallot oil to stir-fry ginger, shallots, and rice before cooking for extra flavor.
- Massaman Curry: Sprinkle crispy shallots on top when serving for added aroma and crunch.

FAQ about Crispy Fried Shallots
1. Why are my fried shallots not crispy?
Answer: You likely haven’t removed enough moisture from the shallots. Additionally, adding shallots to hot oil can cause them to brown too quickly before the moisture has enough time to evaporate. Start with cold oil for better results.
This post may contain affiliate links. As an Amazon Associate, I earn from qualifying purchases at no cost to you. I only recommend products I believe will be helpful to you. If you decide to purchase products through my links, please know that I truly thank you.
2. How long do crispy fried shallots last?
Answer: Typically, they last about 2 weeks. However, if you fry them properly, let them cool completely, and store them in an airtight container, they can stay crispy for 1-2 months.
3. What can I use instead of shallots?
Answer: French fried onions are a good substitute, providing a similar aroma and texture. They also give you larger, crispier flakes.
4. How can I make store-bought fried shallots taste fresh like homemade ones?
Answer: Toast them on the stove over low heat. This process can also release some of the oil, making them fresher and more aromatic.


Crispy Fried Shallots Recipe
Equipment
- 1 mandolin (or slicer or very sharp knife – see the link)
Ingredients
- 2 cups shallots (evenly sliced)
- 1 cup oil (I used avocado oil but vegetable or any neutral oil works.)
- ¼ tsp sea salt
Instructions
- Slice the shallots evenly. Use a mandolin or slicer for a quick and tear-free process.
- Lay the sliced shallots on paper towels. Sprinkle a little salt over them and let them sit for 4-5 minutes. Then, gently blot out the moisture with another piece of paper towel.
- Choose your frying vessel such as a pot or a wok. Use enough oil to submerge all the shallots.
- Add the shallots to the oil and pan before turning on the heat. Then, turn the heat to medium-high. You’ll notice vapors around the pan—that’s moisture escaping from the shallots. Starting with cold oil allows more moisture to escape, resulting in crispier shallots. Sprinkle some more salt at this stage.
- Consistently stir and fry the shallots. Keep the heat on medium until the oil begins to boil. Then reduce the heat to low, stirring frequently to ensure even coloring. The vapor will start to lessen after about 20 minutes.
- Remove the shallots when they turn golden. Scoop them out of the hot oil and spread them evenly on paper towels. For the best results, lay several pieces of paper towel on a cooling rack before spreading the fried shallots. At this stage, they won’t be very crispy yet.
- Let the fried shallots cool completely. As they cool, they will become crispier. Use them right away or store them in an airtight container at room temperature.
Video
@stickyricethaikitchen Fried shallots ingredients 2 cups shallots (evenly sliced) 1 cup oil (I used avocado oil but vegetable or any neutral oil works.) ¼ tsp sea salt #shallot#crsipy#condiments
♬ Flowers – SoundAudio