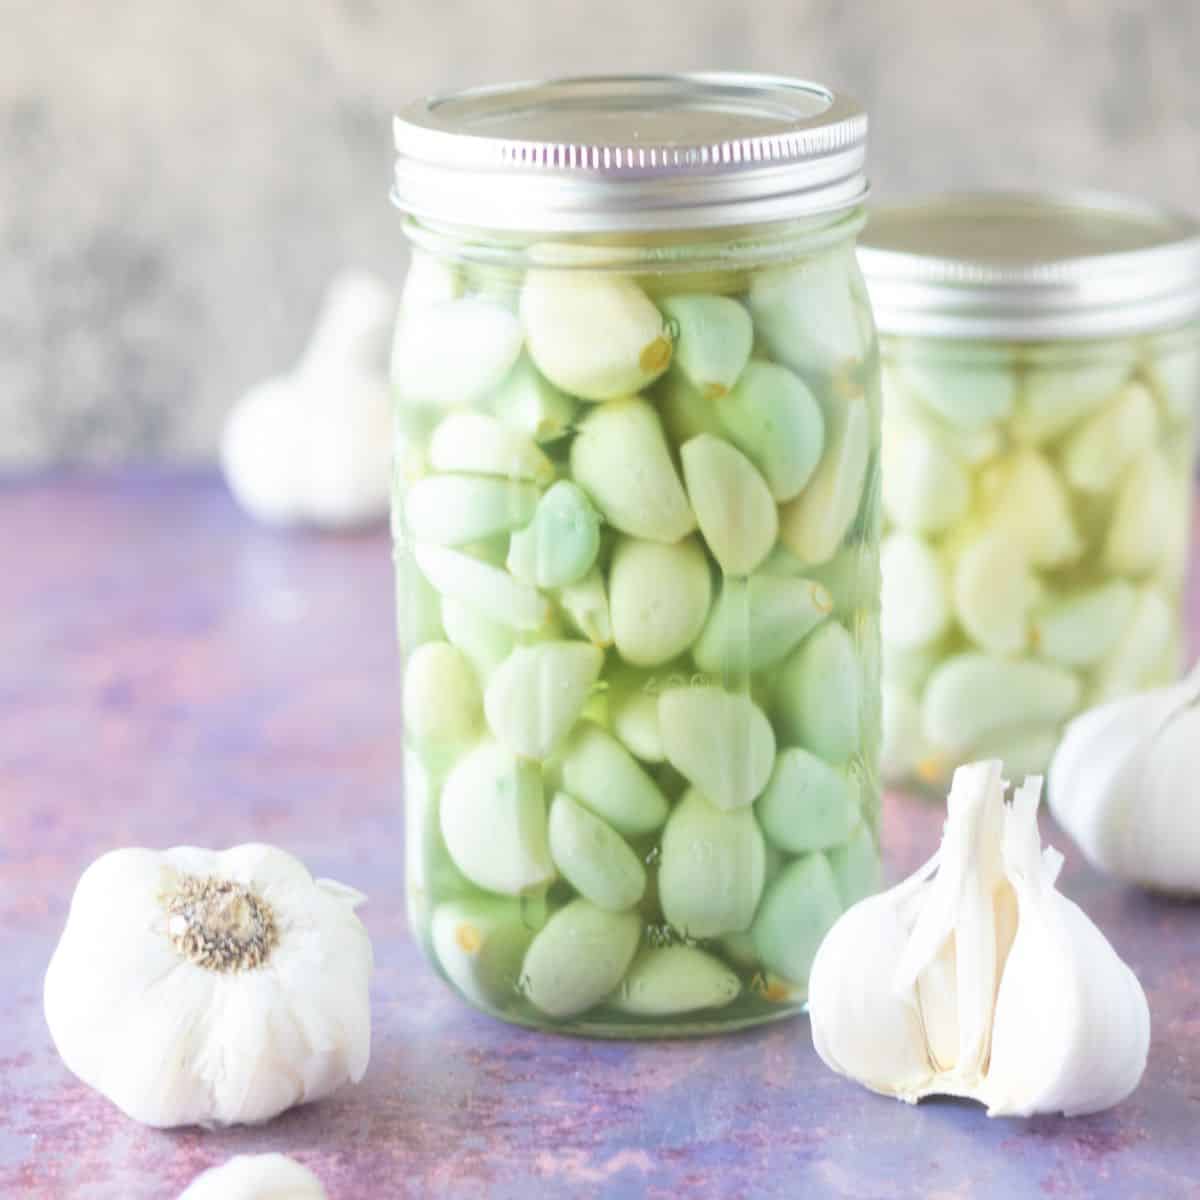
Pickled Garlic
I was shocked at how pricey store-bought pickled garlic is when it’s so simple and budget-friendly to make at home! With just a few ingredients, you can have a jar of tangy, flavorful garlic ready to elevate any dish. Skip the expensive jars and start pickling your own today!
Benefits of Pickled Garlic
Fermented garlic offers several health benefits due to its enhanced bioactive compounds resulting from the fermentation process. Credit: webmd.com
- Antioxidant Properties: Pickled garlic contains increased levels of antioxidants, which help protect your cells from damage caused by free radicals.
- Anti-Allergic Effects: The compounds in pickled garlic may help reduce allergic reactions by modulating immune responses.
- Anti-Diabetic Benefits: Consuming pickled garlic can aid in regulating blood sugar levels, thereby supporting diabetes management.
- Anti-Inflammatory Actions: Pickled garlic possesses anti-inflammatory properties that can help reduce inflammation in the body.
- Anti-Carcinogenic Potential: Some studies suggest that pickled garlic may help inhibit the growth of certain cancer cells, contributing to cancer prevention efforts.

How to Make Fermented Garlic
I highly recommend buying peeled garlic cloves from Sam’s Club or Costco—I got a huge bag for just eight dollars! I usually mince half of the garlic in a food processor, scoop the minced garlic into ice cube trays, and freeze them. Once frozen, I transfer the cubes to a ziplock bag, so I always have minced garlic ready to go. The other half, I pickle for Thai dishes!
This post may contain affiliate links. As an Amazon Associate, I earn from qualifying purchases at no cost to you. I only recommend products I believe will be helpful to you. If you decide to purchase products through my links, please know that I truly thank you.
To ferment garlic:
- Boil some water to prepare the brine.
- Gather your ingredients: salt, sugar, and white vinegar.
- Mix everything together until the salt and sugar dissolve.
- Pour the mixture over the garlic in a clean jar, ensuring it’s fully submerged.
- Store the jar in the fridge for at least two weeks before using.

These pickled garlic cloves will add incredible flavor to your dishes!
Why Do Garlic Turn Blue When Pickled?
If your homemade fermented garlic starts to turn blue, relax and know that they are totally safe and delicious. Garlic turns blue when pickled because its sulfur compounds react with trace minerals like copper in water, vinegar, or salt. This reaction forms copper sulfate, which creates the blue or green tint. Younger, fresher garlic contains more sulfur, making it more likely to change color. The acidity in vinegar can also speed up this reaction, but it does not affect the garlic’s taste or safety. Read more from randysartisanal.

How to Use Fermented Garlic
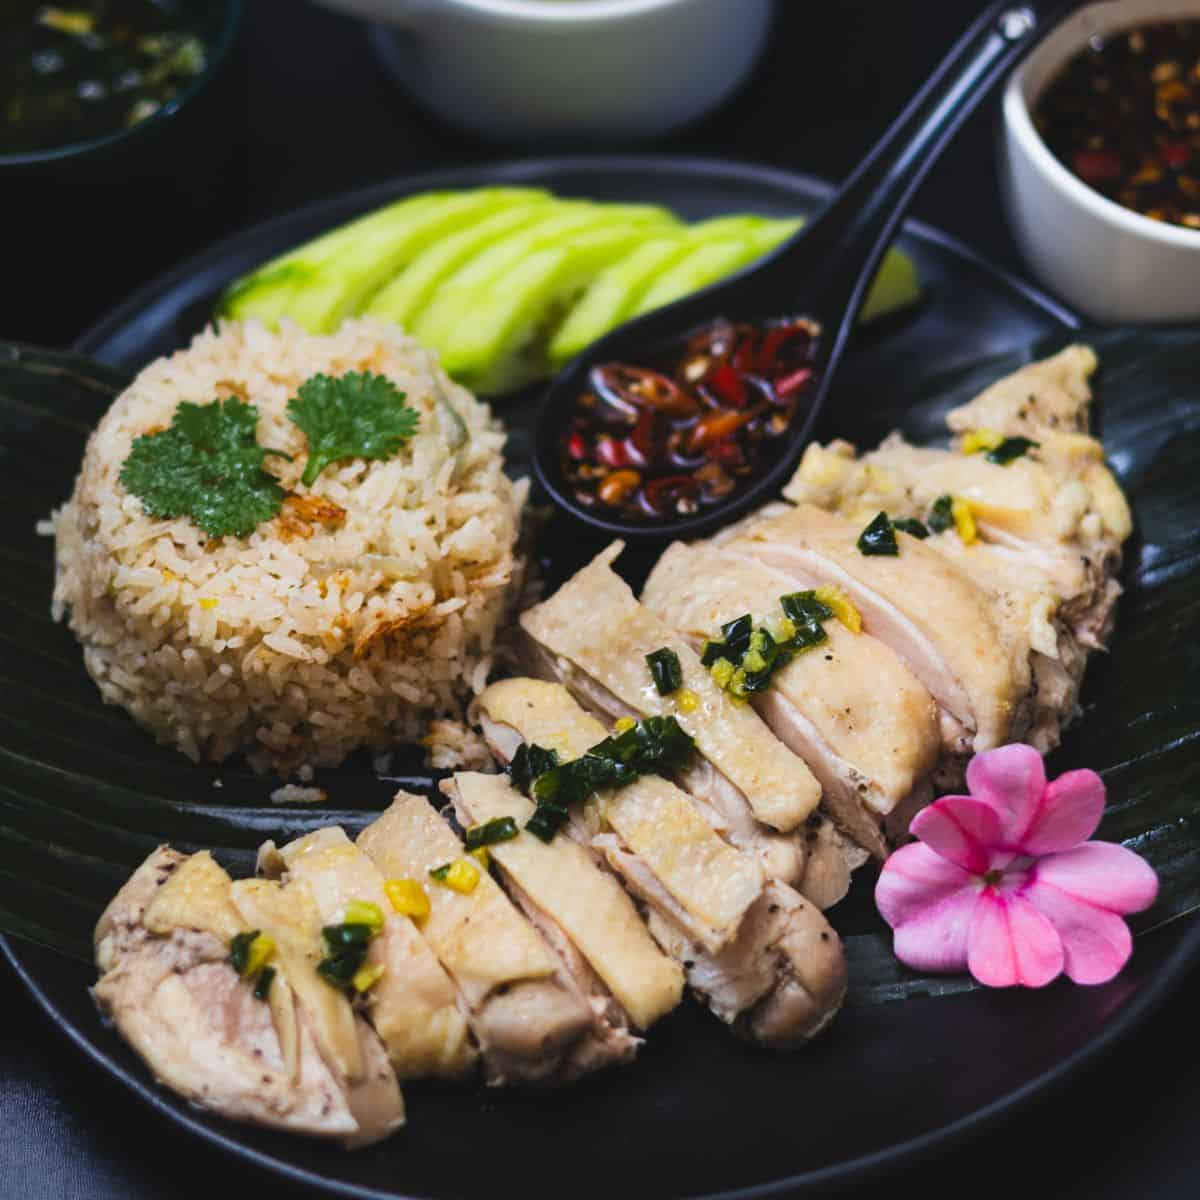
Both the fermented garlic and its juice are incredibly useful. In Thai cuisine, they add great flavor to dipping sauces and salad dressings. For example, you can reduce the sugar in Thai Glass Noodle Salad by replacing it with pickle juice. One of my favorite ways to use fermented garlic and its juice is in the dipping sauce for Thai Chicken Rice, also known as Khao Mun Gai.
How Long Does Pickled Garlic Last?
Store fermented garlic in a clean, airtight glass jar and keep it refrigerated to maintain its freshness. The cold temperature helps preserve its flavor and prevents spoilage. Properly stored pickled garlic can last for several months in the fridge, typically up to six months or longer. Over time, the flavor may mellow, but it will remain safe to eat as long as there are no signs of mold, off smells, or changes in texture.
Related Recipes
- Thai Glass Noodle Salad (Yum Woon Sen)
- Thai Chicken Rice (Khao Mun Gai)
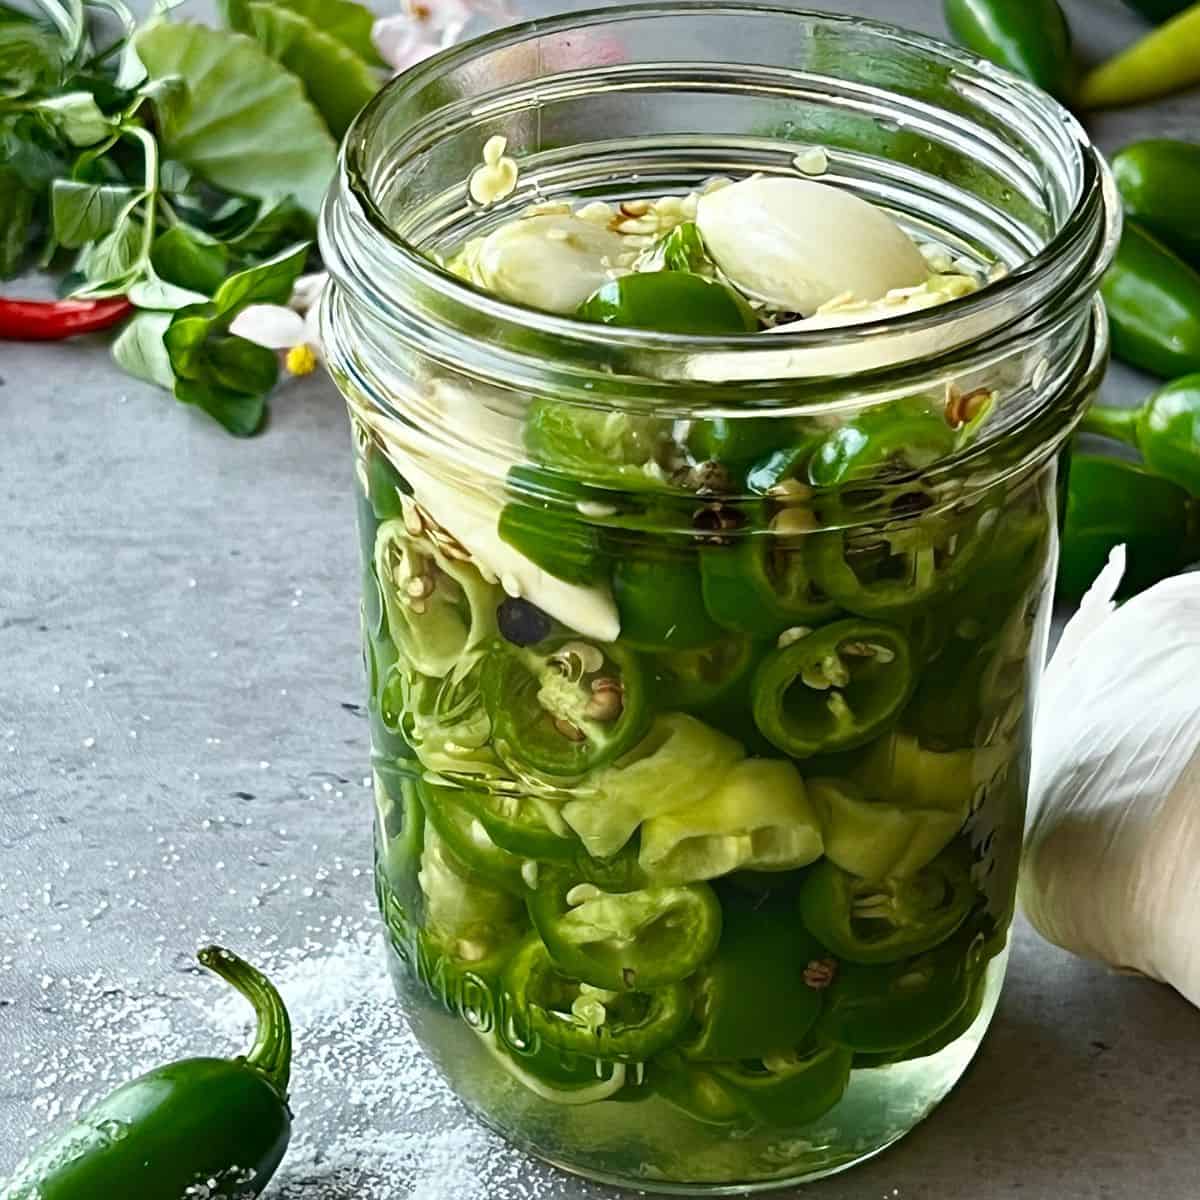
- Pickled Jalapeños: If you are nervous about not using pickled garlic often, make pickled jalapeños and throw some garlic cloves in the jar too. That way you get the best of both worlds!
- Pickled Carrots and Daikon (Radish)
- No knead/ No dutch oven Jalapeño Cheddar Bread


Pickled Garlic
Equipment
- 2 jars (32 ounces jars)
Ingredients
- 1 cup hot water
- 1 cup white vinegar
- ⅓ cup sugar
- 1 tbsp salt
- 1 lb peeled garlic
Instructions
- Bring water to a boil. Meanwhile, fill the jars with peeled garlic.
- In a pot or bowl, combine the salt and sugar.
- Pour the boiling water over the salt and sugar mixture, then stir until fully dissolved to create a brine.
- Pour the brine over the garlic in the jar, ensuring the cloves are fully submerged.
- Close the lid tightly and refrigerate the jar. Let the garlic pickle for at least two weeks before using.